Impregnating the fabric inside a vacuum bag
Where to buy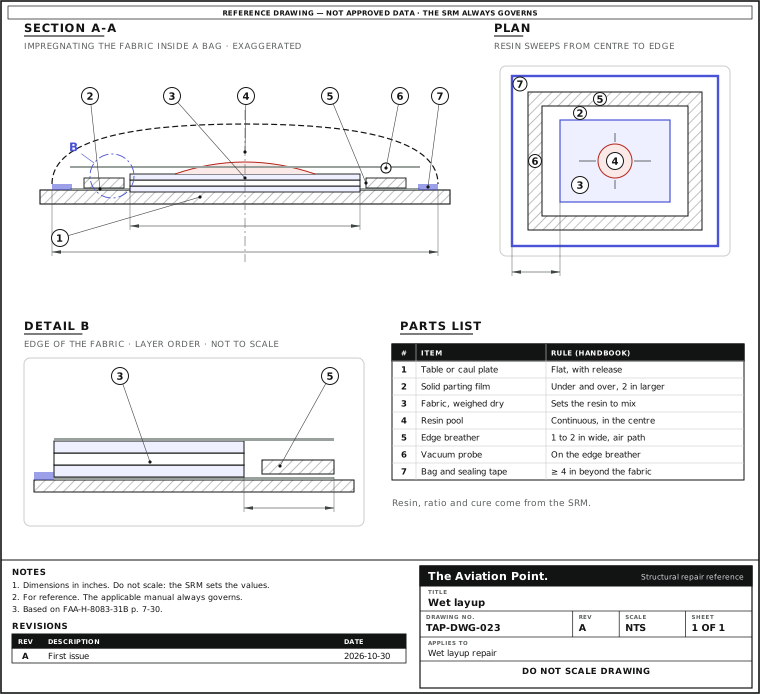
Make a wet layup, one step at a time
| Step | Action | What to do |
|---|---|---|
| 1 | Weigh the fabric | Weigh the dry cloth. It tells you how much resin to mix. |
| 2 | Work out the resin | Use the maker's ratio, by weight or volume as the data sheet says. Mix only what the layup needs. |
| 3 | Mix slowly | Mix slowly and fully, and scrape the edges and bottom of the cup. Mixing fast puts air into the resin. |
| 4 | Soak the fabric | Pour resin in the middle of the fabric and work it out with a squeegee until the fabric is thoroughly wet. Add the next ply and repeat. |
| 5 | Bag it | The bag consolidates the plies and bleeds out excess resin. |
| 6 | Cure | Clean and dry the surface first, because moisture left on the part inhibits the cure. Then cure as the resin sheet and the SRM say. |
| 7 | Test and check | Make a test specimen during the repair, from the same batch and the same cure. Afterwards, tap test the repair and the area around it. |
When a wet layup is the answer
A wet layup suits fiberglass for nonstructural parts; carbon and Kevlar dry fabric can also be used with a wet-layup resin system (Handbook p. 7-25). Many of these resins cure at room temperature, are easy to use and keep for long periods on the shelf.
The price: a room-temperature wet layup does not restore the strength and durability of a part cured at 250 or 350 °F when built, and wet-layup properties are generally lower than prepreg (p. 7-25). Some wet-layup resins cure hot and do better.
The AC 43.13-1B fiberglass repairs are for non-structural fairings, covers, cowlings and honeycomb panel facings. They are not to be used on radomes or on carbon or Kevlar parts (para. 3-2).
Mixing: three minutes, slowly, and no more than you need
Mix slowly and fully for three minutes when the resin has no dye to show it is blended. Mixing fast puts air into the resin. Scrape the edges and bottom of the cup: unmixed resin may not cure (Handbook p. 7-29).
Do not mix large quantities of quick-curing resin. It gives off heat after mixing; overheated, it can smoke, and the smoke can burn or poison (p. 7-29). Mix only what the layup needs, and mix a second batch if you need more than the maximum batch size.
Resin and hardener go in by the maker's ratio, by weight or volume as the data sheet says; the mix ratio calculator does the sum, and the pot life calculator checks your working time. The Handbook gives no pot life: it is on the resin's data sheet.
Epoxy components may need refrigeration until used; the label gives the storage temperature, typically 40 to 80 °F for most epoxy resins and below 40 °F for some (p. 7-25).
How much resin
| Source | What it says | Use |
|---|---|---|
| Handbook p. 7-12 | A 60:40 fibre-to-resin ratio is considered optimum. Fibres showing at the surface mean resin starved; too much resin adds weight | Judge the finished part |
| AC 43.13-1B para. 3-3a(2) | A weight of resin equal to the weight of the glass patch gives a 50 percent ratio | Glass patches of the AC repairs |
| Handbook p. 7-29 | The right amount matters: too much or too little affects the strength of the repair | Weigh, do not eyeball |
The two figures differ because the sources describe different things (the Handbook's is the optimum for a finished laminate, the AC's a rule for its fiberglass patches). The resin maker's sheet and your SRM give the ratio for your repair.
Compare the ways to wet out fabric
Squeegee
- How it works
- Pour resin in the middle of the fabric and work it out by hand until the fabric is thoroughly wet.
- Good for
- Laying up on a caul plate.
- Watch for
- It traps more air than the vacuum-assisted way, and a bag still has to consolidate the plies.
Vacuum-assisted
- How it works
- Seal the fabric and resin between films under a bag, then sweep the resin from centre to edge.
- Good for
- Tight-knit weaves, and when you need a near-optimum ratio.
- Watch for
- Wait for the air to leave before you sweep the resin.
Edge bleed
- How it works
- A strip of breather goes round the repair, with no film or bleeder on top.
- Good for
- A small room-temperature wet layup.
- Watch for
- Use a squeegee to push air and excess resin to the edge.
Impregnating: squeegee or vacuum bag
Brush and squeegee. Put release on a caul plate, lay the fabric on it, pour resin in the middle and work it out with the squeegee until the fabric is thoroughly wet. Add the next ply and repeat. A bag then consolidates the plies and bleeds excess resin and volatiles. Most cure at room temperature; up to 150 °F speeds the cure (p. 7-30).
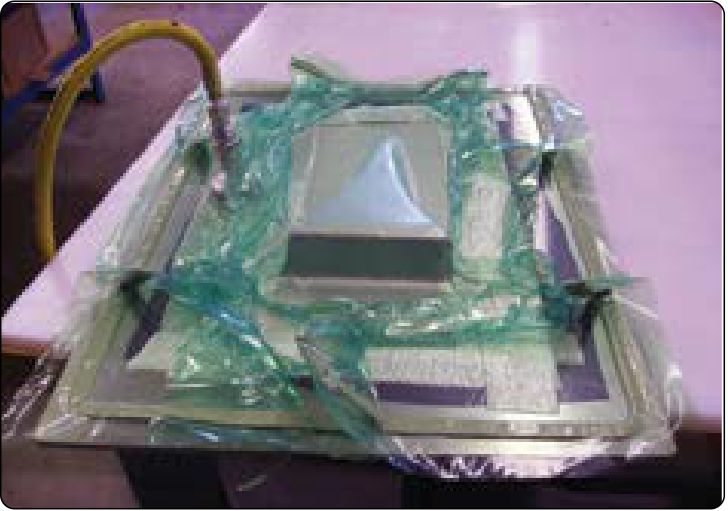
Vacuum-assisted. Preferred for tight-knit weaves and when a near-optimum ratio is needed: it traps less air than a squeegee (p. 7-30). The Handbook's order: sealing tape on the table, at least 4 in larger than the fabric; an edge breather 1 to 2 in wide beside it; a solid parting film 2 in larger than the fabric; weigh the fabric to find the resin mix; fabric on the film; breather between the fabric and the edge breather; a continuous pool of resin in the middle; probes on the edge breather; a second film the same size or larger; bag and vacuum; wait 2 minutes for the air to leave; sweep the resin from centre to edge with a squeegee; then remove the fabric and cut the plies (pp. 7-30, 7-31).
Edge bleed is the usual bag for a small room-temperature wet layup: a 2 in strip of breather around the repair, no film or bleeder on top, and a squeegee to push air and excess resin to the edge (p. 7-28).
Worked example: weighing the resin
Four plies of glass cloth cut as one sheet. A made-up case with a made-up resin (100 parts A to 30 parts B by weight) to show the arithmetic; read your own resin sheet.
- Weigh the dry sheet: 80 g.
- The AC's 50 percent rule: resin weight = fabric weight, so mix 80 g of resin.
- Split 80 g in the ratio 100 : 30: part A = 80 × 100 / 130 = 61.5 g; part B = 80 × 30 / 130 = 18.5 g.
- Mix slowly for three minutes, scraping the cup, then impregnate and bag within the working time on the sheet.
61.5 g of part A and 18.5 g of part B for an 80 g sheet.
Cure, check and keep a test piece
Cure at room temperature, or with heat up to 150 °F to speed it (Handbook p. 7-30). Clean and dry the surface first: moisture left on the part inhibits the cure (AC para. 3-2a).
Make a test specimen during the actual repair, from the same batch of adhesive or resin and with the same cure pressure, temperature and time, so it can be tested to destroy (AC para. 3-1c).
Afterwards, tap test the repair and the area around it (Handbook p. 7-15).
For UAV, model and homebuilt work
Squeegee wet layup with edge bleed is how most small parts are made. The common failures are the same: resin mixed too fast or in too large a batch, resin-starved plies from too much squeezing, and trapped air. A scale, a squeegee and a plan for the batch size fix most of it. A room-temperature layup is not a like-for-like repair on a certified part.
Questions people actually ask
How much resin does a wet layup need?
Enough to wet the fabric, no more. The Handbook calls 60:40 fibre to resin optimum; the AC puts resin equal to the glass patch weight for a 50 percent ratio. Weigh both.
Why mix for three minutes and slowly?
Unmixed resin may not cure, and fast mixing whips air in (Handbook p. 7-29).
Is a wet layup as strong as the original?
Not at room temperature. It does not restore the strength and durability of a part cured at 250 or 350 °F, and its properties are generally below prepreg (Handbook p. 7-25).
Why do I weigh the fabric?
It sets the resin to mix, and the resin amount sets the strength (Handbook pp. 7-29, 7-30).
Limits of this guide
What the sources support, and no further.
- The manual governs. Resin system, ratio, cure and ply schedule come from the SRM and the resin maker's sheet.
- No pot life here. The Handbook gives none; take it from the data sheet.
- Scope. The AC repairs are for non-structural fiberglass, not radomes, carbon or Kevlar. The example is invented arithmetic.
- Not covered. Infusion, resin transfer moulding and wet layup on moulds.
Where to buy
Distributors coming soon.
Sources
- FAA-H-8083-31B, AMT Handbook — Airframe, Volume 1 (2023), Chapter 7 — p. 7-12, resin-starved and resin-rich parts, 60:40; p. 7-15, tap testing; p. 7-25, wet layups, storage; p. 7-28, edge bleedout; pp. 7-29 to 7-31, mixing resins, saturation, brush and squeegee, vacuum-assisted impregnation.
- AC 43.13-1B, Change 1, Chapter 3, Fiberglass and Plastics — para. 3-1c, test specimens; para. 3-2, scope and surface preparation; para. 3-3a(2), resin weight equal to patch weight (50 percent).