The drawing
Where to buy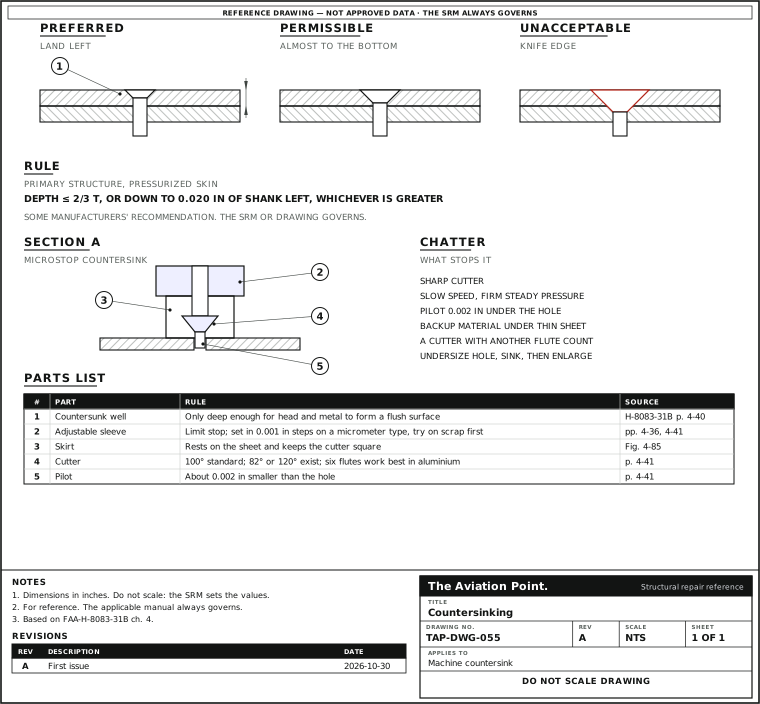
Step by step
| Step | Action | What to do |
|---|---|---|
| 1 | Check the sheet | Compare sheet thickness with the head depth. Below the minimum, dimple. Check it here. |
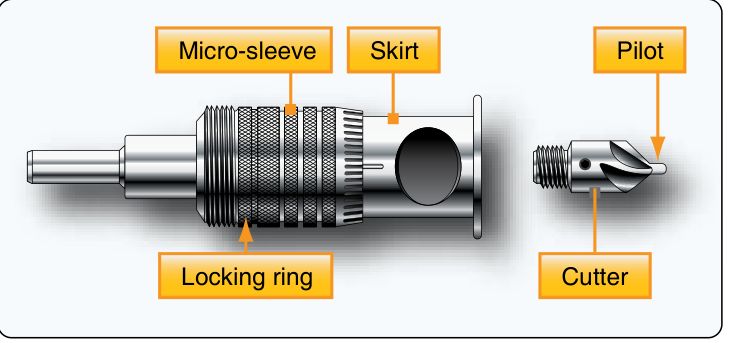
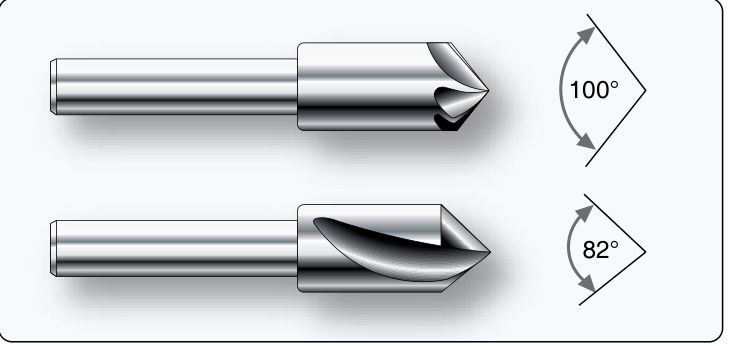
| 2 | Fit the cutter | Angle to match the head, 100° for standard rivets. Pilot about 0.002 in smaller than the hole. |
| 3 | Set the stop | Adjust the microstop sleeve; a micrometer type moves in 0.001 in steps. |
| 4 | Try on scrap | Same material. Cut, drop in a rivet and adjust until flush. Cage setting. |
| 5 | Cut | Slow speed, steady firm pressure, tool perpendicular. Use backup under thin sheet to hold the pilot steady. |
| 6 | Freehand only if you must | Where a microstop will not fit. Practise on scrap first; hold the motor steady and square. |
| 7 | Check each well | Drop a rivet in: flush, seated all round. Keep the rivet slightly high before driving, so the blows land on the rivet, not the skin. |
Tools you need
| Tool | What for | Buying guide | Catalog |
|---|---|---|---|
| Microstop cage | Depth stop; the preferred tool | Countersink cages | Wescon 596-S |
| Cutter with pilot | 100°, six flutes work best in aluminium | Countersink cages | Piloted cutter |
| Microstop kit | Cage and cutters together | Countersink cages | 9-piece kit |
| Rivet shaver | Trims a proud head where allowed | — | Shaver kit |
Countersink or dimple?
Countersink
- Sheet
- Thick enough for the head
- Metal
- Removes metal; may need more fasteners
- Risk
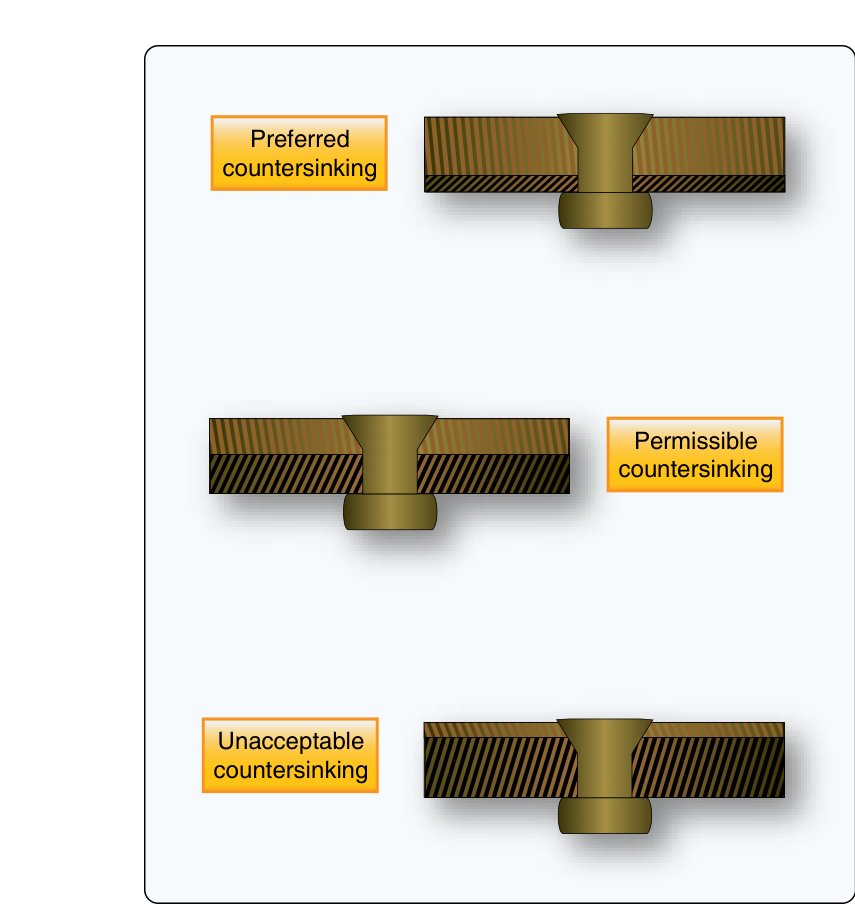
- Knife edge if too deep
Dimple
- Sheet
- Too thin to countersink
- Metal
- Removes none; dimples nest
- Risk
- Cracks round the dimple
FAA-H-8083-31B pp. 4-40, 4-42.
Quick check
The cutter chatters in thin sheet. Which is a Handbook remedy?
- Back up the sheet to steady the pilot
Best fit. Yes, and the same list includes sharp tooling, slow speed and a pilot 0.002 in under the hole.
- Run the motor faster
Not this one. The Handbook asks for a slow speed.
- Ease off to very light pressure
Not this one. It asks for steady, firm pressure.
On a real job, the SRM decides.
What to check when it is done
| Look at | Good | If not |
|---|---|---|
| Depth | Head flush, within the outer sheet | Too deep: knife edge. Stop and refer to the manual |
| Well | Smooth, no chatter marks, concentric | Chatter: see the list on the drawing |
| Hole | Not enlarged | Next size or repair, per the manual |
| Edge distance | Allows for the flush head: more than for a universal head | Check before cutting |
Questions people actually ask
What is the standard countersink angle?
100°. 82° and 120° exist for other fasteners.
How deep can I go?
Enough for the head and metal to be flush. For primary structure and pressurized skin, the Handbook reports some manufacturers limit depth to 2/3 of the outer sheet or to 0.020 in of shank left, whichever is greater. Your SRM decides.
Limits of this guide
What the sources support, and no further.
- The manual governs. Where the SRM, the drawing or the fastener maker says otherwise, follow them; this page explains general practice.
- The 2/3 rule is not universal. The Handbook calls it a current manufacturer recommendation, not a general limit.
Where to buy
AmericaDistributor coming soonOur partner for this region is on its way
EuropeDistributor coming soonOur partner for this region is on its way
OceaniaDistributor coming soonOur partner for this region is on its way
Distributors coming soon.
Sources
- FAA-H-8083-31B, Aviation Maintenance Technician Handbook: Airframe, Chapter 4 — p. 4-36, countersinking tool; p. 4-40, depth, Fig. 4-91; p. 4-41, tools and chatter.
Educational reference only. not approved data. Always consult the applicable SRM, AMM, or AC 43.13-1B and your certifying authority.